
This is going to be one of those practical posts where we get back to the basics of cooking. When I was first learning how to cook, I cooked my rice in the microwave because it was the way my mom always did it, and predictably my rice boiled over into a starchy puddle of goop. Other people swore by their rice cookers as the secret to creating perfect rice, but truthfully no one really needs yet another unitasker appliance taking up precious real estate in their cupboards. In an interesting turn of events, my husband taught me the secret to cooking perfectly tender, fluffy brown rice every single time.
You've undoubtedly heard at some point that brown rice is better for you than white rice, but why is that exactly? Simply put, brown rice is less refined than white rice, and still contains its side hull and bran making it a whole grain. These parts of the grain contain a ton of nutrients including selenium, manganese, and antioxidants. It also contains naturally occurring oils that can have a positive impact on cholesterol levels. Brown rice is an excellent source of fiber, which helps aid digestion, helps with satiety, and can help stabilize blood sugar levels making it an excellent choice for diabetics. But wait, the white rice in your cupboard says it's enriched, that means it's healthy, right? Don't be fooled by marketing materials on packaging! Because white rice has been stripped from it's naturally occurring iron, vitamins, zinc, magnesium and other nutrients during the refining process, manufacturers replace these with synthetic vitamins, making it more marketable as a "nutritious" food. This is why you need to be a savvy consumer and read ingredient labels, not just the flashy ads on packaging.
If your family objects to the texture of brown rice, give this preparation method a try. It creates a surprisingly fluffy yet tender rice that even brown rice skeptics can appreciate. If your family still objects, ease them into brown rice by mixing cooking brown rice 25/75 or 50/50 with cooked white rice to help them get used to the texture. Another option is to try different varieties of brown rice to find one that is particularly pleasing, see my comments below. Just make sure you cook brown rice separately from your white rice as they have dramatically different cooking times. I'm a fan of always making extra rice and either refrigerating it for use the next day or putting it in the freezer so I have some extra on hand when I am short on time. Enjoy!
Step 1: Selecting Rice
 |
Some rice varieties come with staggering price tags, but you really don't need to pay outrageous prices for rice. I shop in the international aisle of my local megamart and find a large bag of imported, very generic looking rice, often with a label that I can't read. This rice is reliably inexpensive and cooks beautifully which is what I'm looking for. You may have seen recent news reports that US grown rice has been found to have high levels of arsenic. For whatever reason, imported rice from Thailand has been tested and found to have lower levels of arsenic, which I think is a convincing reason to give imported rice a try.
Step 2: Rinse Your Rice
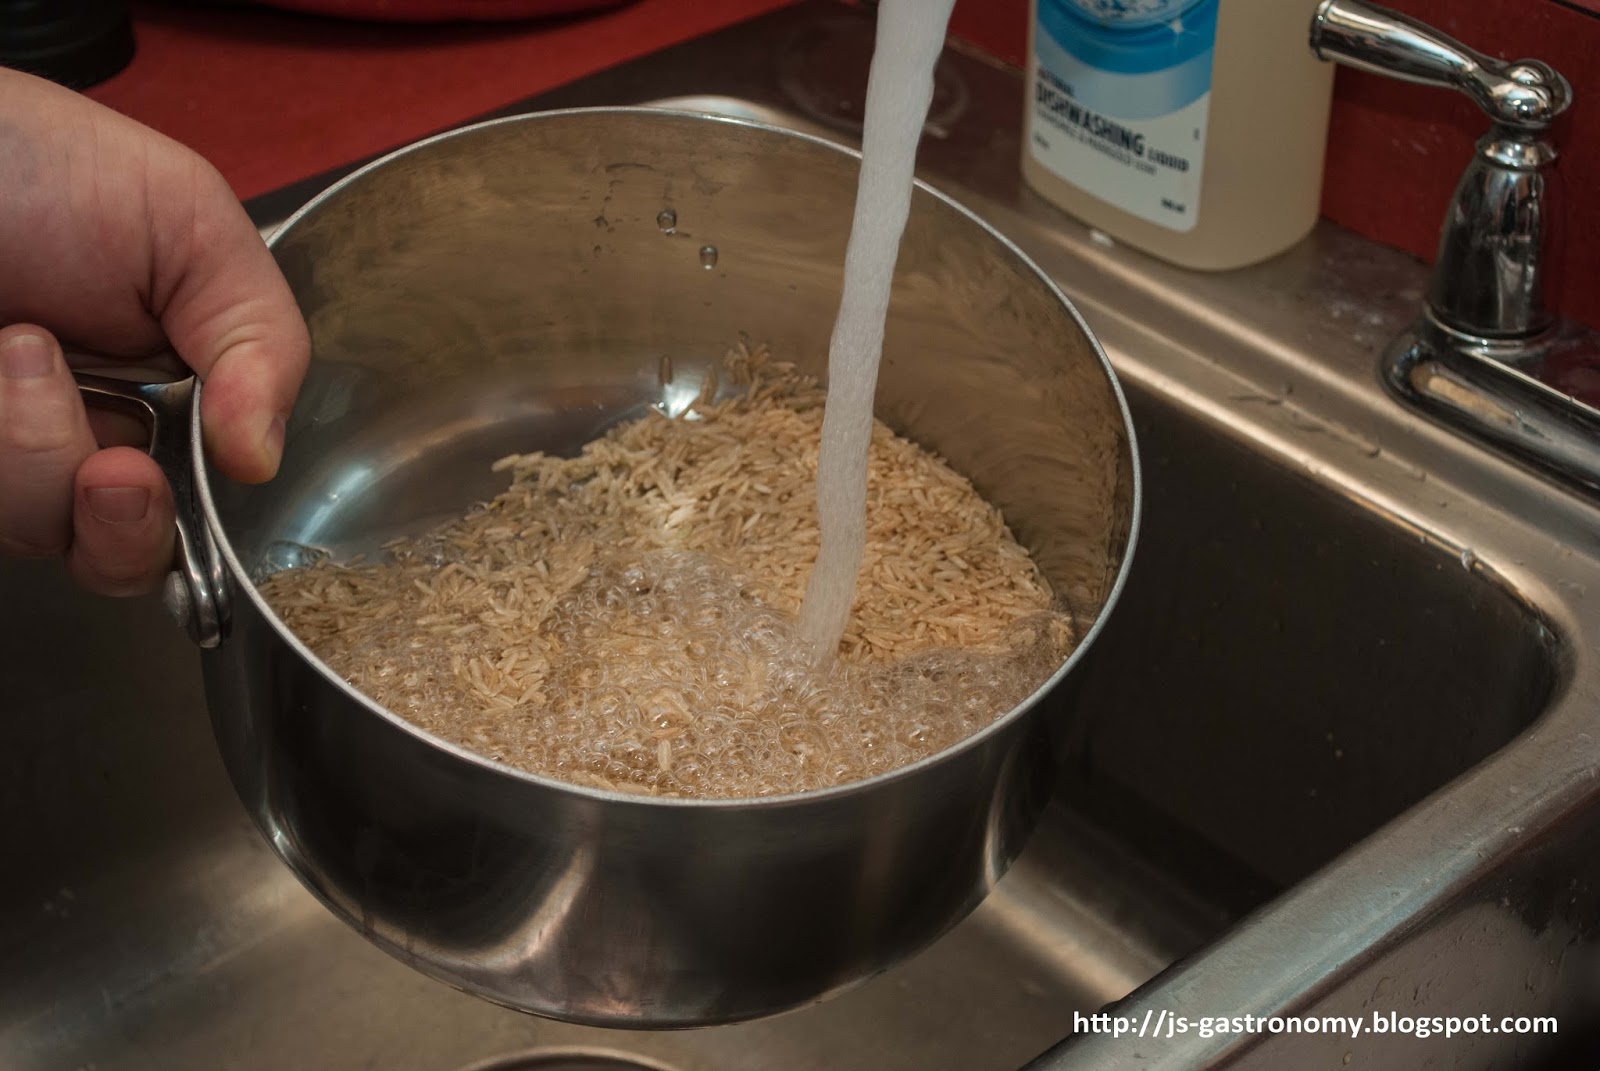 The secret to perfect rice is rinsing the grains prior to cooking. This removes the excess starches that build up on the outside of the grains during processing. It also helps to soften the outer side hull and bran which makes your rice cook faster. You'll want to do this a total of three times before you add water and begin cooking your rice. The result is a nice clear water bath in which you'll cook your rice, see below.
Step 3: Add Water
How much water to add varies a little bit depending on the type of rice you're cooking. For every 1 cup of dry rice add the following amounts of water:
Long Grain Brown Rice: 2 1/4 cup
Brown Basmati Rice: 2 cups
Brown Jasmine Rice: 2 cups
 Brown Arborio Rice can absorb up to 6 cups of liquid and still maintain its texture, so always consult your risotto recipe when working with arborio. If in doubt, always check your package directions to see their recommendations. This tutorial leaves some flexibility so you can add more water later should you need it, use these recommendations as a starting point.
 Pour your measured cold water over your rice and add either a pat of butter or 1/2 Tbsp of grapeseed or olive oil to your pan. I tend to favor using oils for their heart health benefits, but butter shows up better in photographs for a tutorial! Another tip: if you are making plain rice to serve to someone who is ill, try using low-sodium chicken broth as your cooking liquid instead of water to add some extra flavor. This can be very helpful for kids sick with stomach bugs or people undergoing chemotherapy.
Step 4: Get Cooking

Place over high heat, uncovered, stirring occasionally, until the mixture comes to a boil like this. Stir once more very well, ensuring you get any rice that may have started to stick to the bottom of the pan loose. This initial boil gets the cooking process started, but is not intended to fully cook the rice.
 After stirring the boiling mixture thoroughly, cover with a tight-fitting lid and reduce heat to low. From this point on you are strictly forbidden to do the following: open the lid, stir the rice, add more water, or adjust the heat. Let the mixture sit and do its thing for about 20 minutes. From this point on, check the rice every 5 minutes to see if it is done and if all the cooking liquid is absorbed, replacing the lid and keeping the heat on low between checks. If you run out of cooking liquid and your rice is still too firm, add another 1/4 c of water at a time. Whatever you do, don't actually stir the rice during this time! Your goal is to steam your rice to al dente perfection, which for brown rice should take somewhere between 30-40 minutes.
 After stirring the boiling mixture thoroughly, cover with a tight-fitting lid and reduce heat to low. From this point on you are strictly forbidden to do the following: open the lid, stir the rice, add more water, or adjust the heat. Let the mixture sit and do its thing for about 20 minutes. From this point on, check the rice every 5 minutes to see if it is done and if all the cooking liquid is absorbed, replacing the lid and keeping the heat on low between checks. If you run out of cooking liquid and your rice is still too firm, add another 1/4 c of water at a time. Whatever you do, don't actually stir the rice during this time! Your goal is to steam your rice to al dente perfection, which for brown rice should take somewhere between 30-40 minutes.
Step 5: Fluff
If you carefully followed my instructions you should run out of cooking liquid at the same time your rice is perfectly cooked. At this point, fluff that rice with a fork and get ready to enjoy! If you want to be a real cooking pro, you'll double the amount of rice you planned to make and use the leftovers for fried rice and using up those leftover and forgotten veggies that are starting to look a little sad in your crisper.
No comments:
Post a Comment
Tell me what you think...